
The Best Launch Monitor for Your Home Golf Simulator: A Field-Tested Guide
Most golfers initially buy the wrong launch monitor for their home golf simulator.
They see a premium unit in a YouTube video and assume it's the best choice. Or they go budget without understanding what data they'll miss. A few months later, they're either underwhelmed or realise they overspent on features that just can’t work in their setup.
The Pop Up Golf is a mobile golf simulator service that sets up home golf simulators in garages and backyards every other week. Our field testing is clear. The best launch monitor is the one that fits your room, matches your goals, and behaves predictably within your setup.
If you want to see how a professional mobile golf setup looks, explore our mobile golf simulator hire packages ↗. Or perhaps you’ve already planned everything out and just need an external sounding board before committing to your first purchase. Book a complimentary consultation ↗ and walk through your space and goals with us.
Start with your space, not the launch monitor
Before you compare models, first measure your space. Write down the following measurements for your setup:
Ceiling height
Total depth from your impact screen to the opposite (back) wall
Width of your hitting area
Lighting conditions
These measurements will help you decide whether a Radar (Doppler) or Camera-based (Photometric) launch monitor is realistic and effective in your setup.
Radar vs Camera-based launch monitors + a quick pros and cons list
Although it decides which launch monitors will actually work in your home golf simulator, this decision is often overlooked.
Radar and camera-based units each have their benefits and drawbacks, so it’s important to carefully consider both in the context of your own setup. Below is a brief explanation of the launch monitors and a list of pros and cons. Our checklists below will help you quickly answer the question of ‘should I use a radar or camera-based launch monitor for my home golf simulator?’.
Radar units (behind the player)
Devices like the Garmin Approach R10 sit about 1.8 metres - 2.4 metres behind you and track the ball in flight. Radar units work best in:
Open or flexible spaces
Setups with enough depth in front and behind the ball
Golfers who seek portability between locations.
Pros
Easy to move between sessions, perfect for multi-purpose rooms like garages and carports
Performs well in open spaces when tracking full ball flight
Can double as an outdoor practice tool
Good value for basic ball data and distance work
Cons
Need more depth than camera-based units
More sensitive to ceiling height and nearby walls
Can struggle in tight garages or very short indoor bays
Misreads are more likely with restricted ball flight or poor levelling and alignment
An important thing to note is the ceiling height and total depth. Recently, I set up in a garage with a 2.6 metre ceiling. The Garmin R10 worked, but we had to adjust placement twice to avoid misreads on high lofted shots.
Camera-based units (beside the ball)
Units like SkyTrak sit beside your hitting area and capture the ball at impact. Photometric units work best in:
Permanent/Semi-permanent enclosed garages and spare rooms with limited ambient lighting
Spaces with controllable lighting
Setups where you prioritise strong ball data, often for practice and gapping data
Pros
Work well in tighter indoor spaces with limited depth
Less sensitive to total ball flight distance
Often provide very consistent carry numbers in controlled lighting
Strong ball data for gapping and distance control
Cons
Less portable than small radar units
Relies on stable and controlled lighting for best results
Usually live beside the ball, so you must protect the unit from shanks and mishits
Typically indoor focused, with less flexibility outdoors
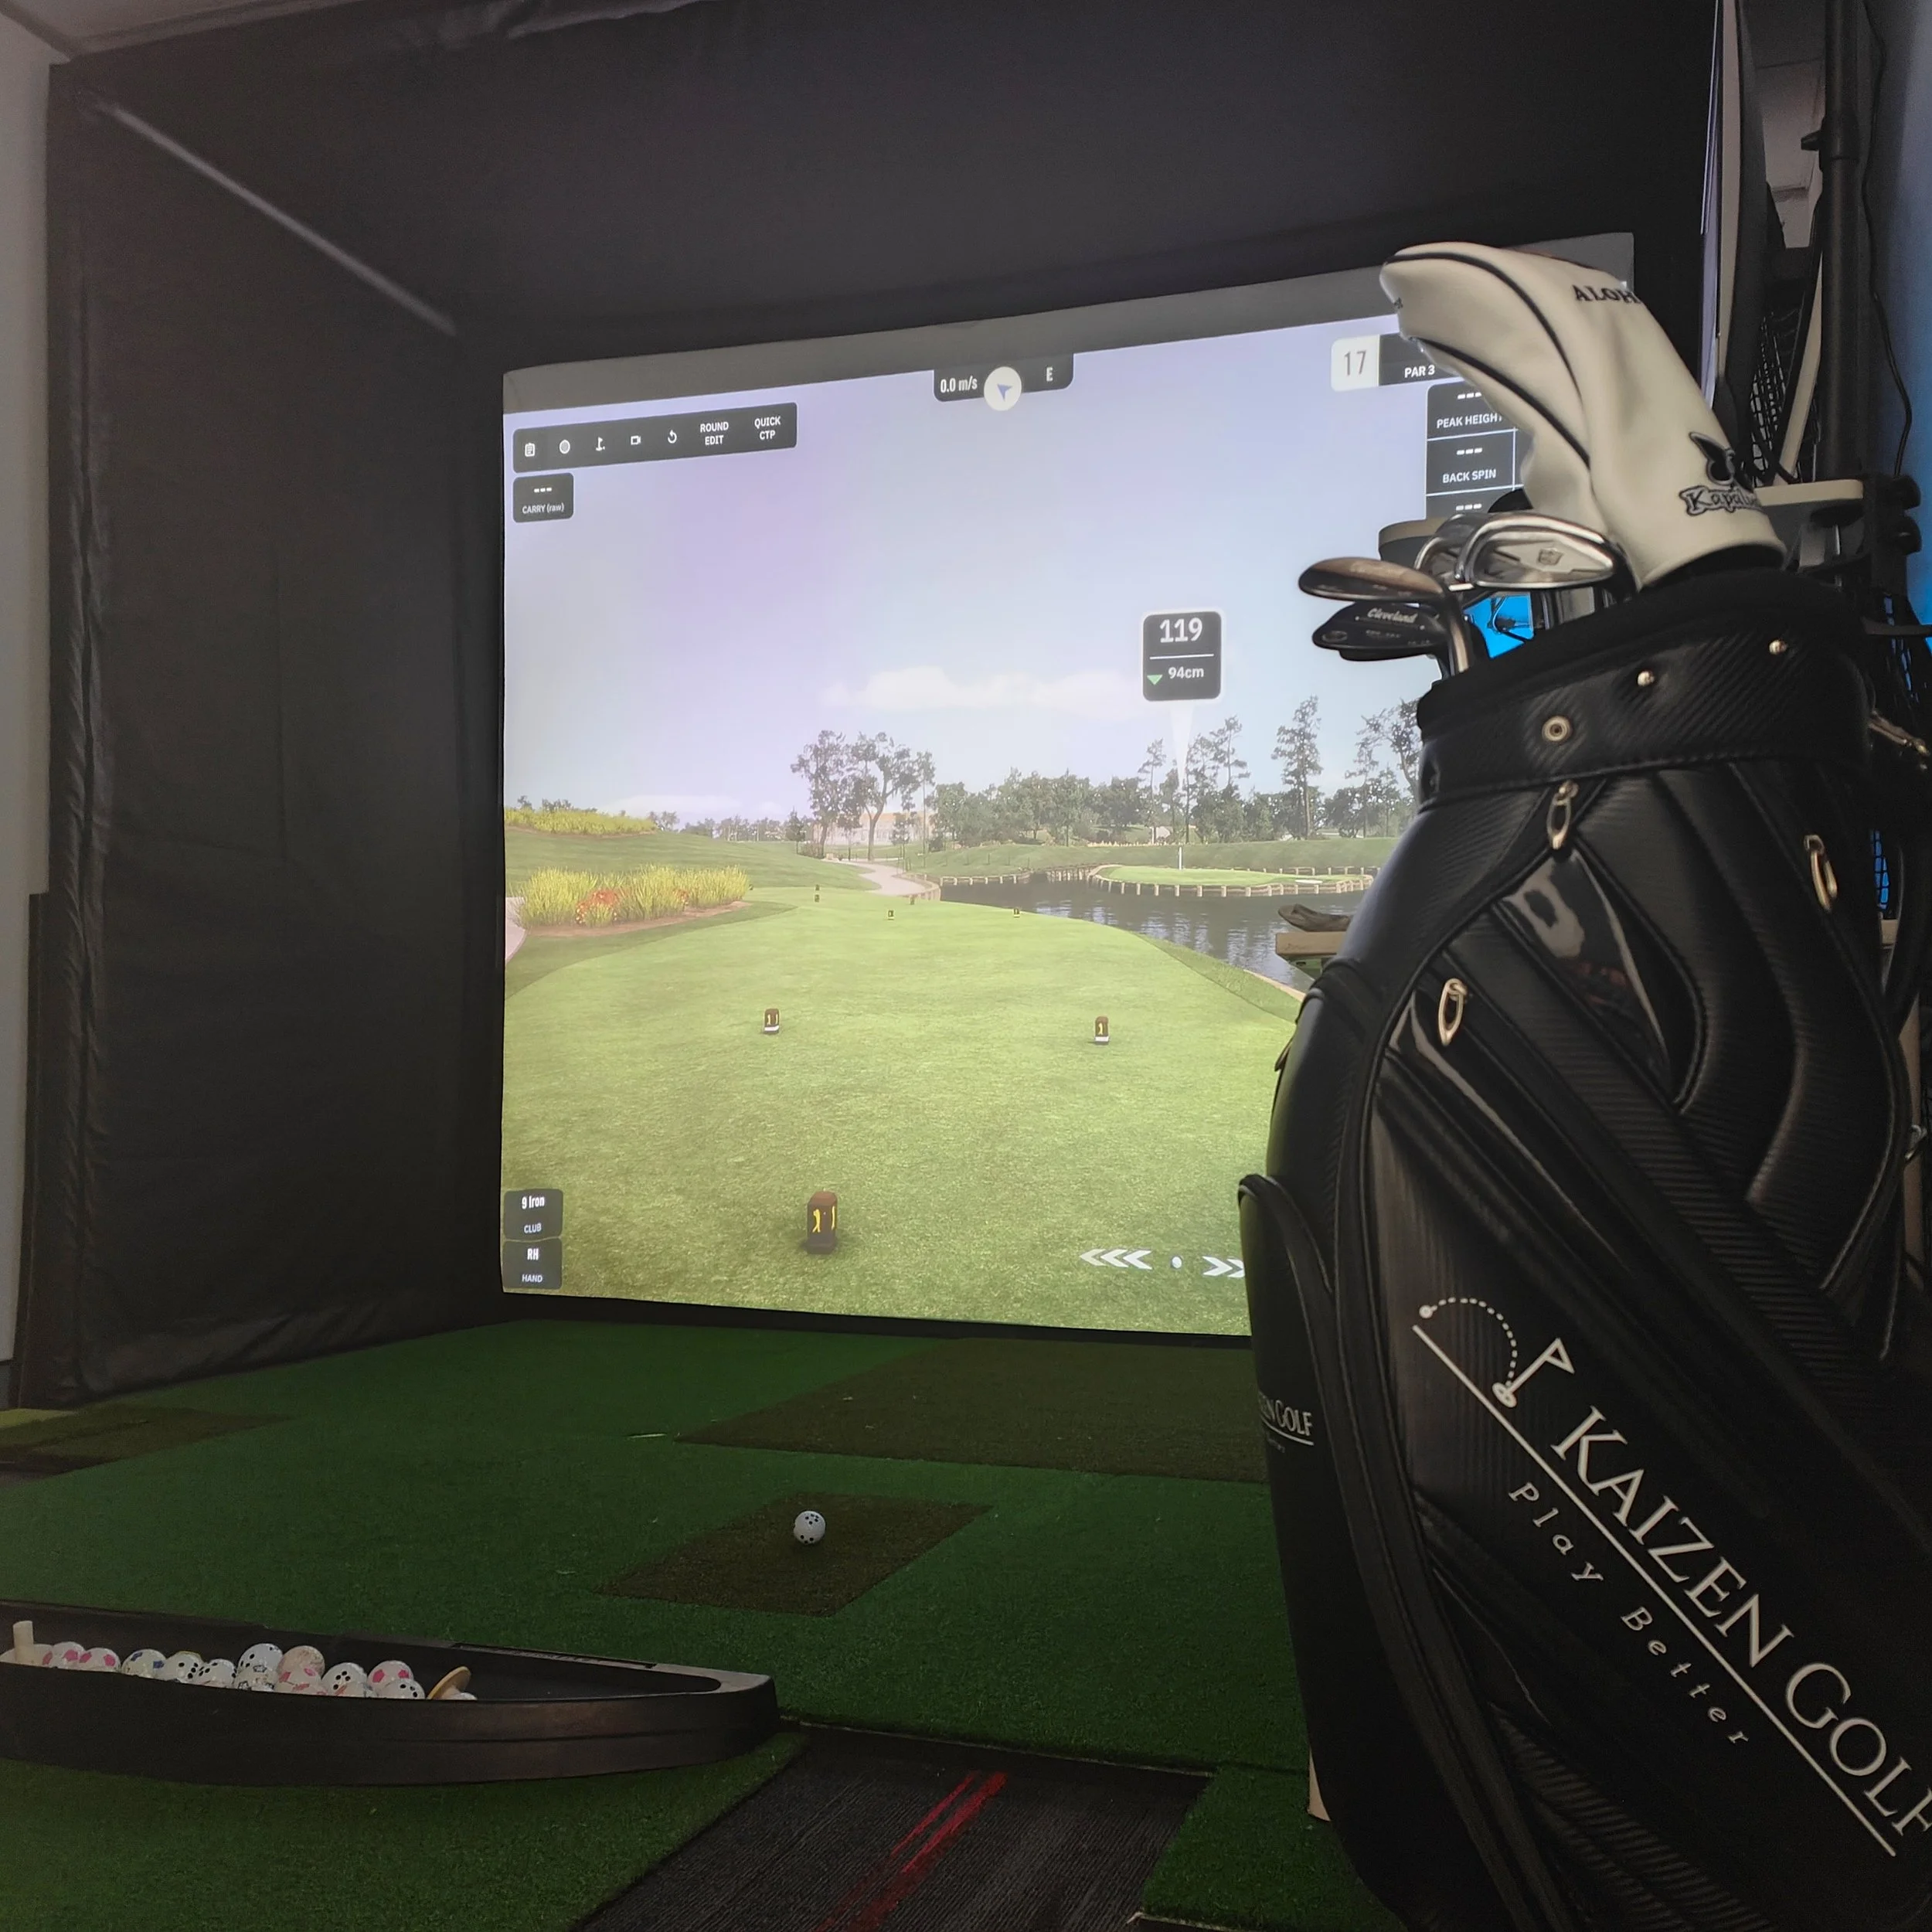
In a windowless garage with LED strips, SkyTrak gave me carry distances similar to what I’d get on a real course. My 7-iron that carries roughly 145 metres on the course read 140 to 146 metres across multiple sessions. That consistency makes indoor practice worth the time and cost.
The three setup tiers
Use these tiers as a guide. Total cost includes launch monitor, screen or net, mat and basic tech to get you up and running.
Entry level home setup ($800 to $2,500 total)
If you’re testing the waters or you just want a budget-friendly way to practice at home, this tier is perfect. A typical entry level stack might look like:
Garmin Approach R10 Launch Monitor
Basic Impact Net or Screen
Decent hitting mat
A laptop which meets the minimum simulator specs
With an entry level setup, you would get ball speed, launch angle, and carry distance, enough to run virtual range sessions and play simple simulator golf without building a full room.
Dedicated home setup ($2,500 to $8,000 total)
At this level, simulation will start to feel like real golf. A typical dedicated simulator setup could include :
SkyTrak or Bushnell Launch Pro as the Launch Monitor
Quality impact screen with noise deadening
HD projector
Premium hitting mat
Gaming PC or a capable laptop
If you want to browse ready-made, complete simulator packages instead of building from scratch, Kaizen Golf [↗] is a Sydney-based retailer selling complete simulator packages ↗, including gaming PCs and accessories. Their bundles are a helpful reference for realistic Australian pricing and good value, especially for the average home build.
Last weekend I played St Andrews using this setup. My driver was its usual unpredictable self, but my 3-wood gave me consistent 180 metre carries. 9 iron spin hovered around 7,000 RPM.
When your simulator numbers line up with your outdoor game, the practice actually transfers to the course.
Premium studio setup ($8,000 to $20,000+ total)
A typical premium studio-grade stack could include:
TrackMan, Foresight GC series or Uneekor Launch Monitor
Dedicated golf simulator room with acoustic treatment and controlled lighting.
High luminosity 4K projector
High performance PC with a dedicated GPU and external SSD.
The advantages at this level are:
Full club data: attack angle, club path, face angle and delivered loft. Mid-tier systems aren’t equipped to provide this high-level feedback
Tight and reliable feedback when chasing the 2% improvements
Studio quality simulation and visuals
Most home golfers don’t need this tier. This setup makes sense if you want a primary practice hub, you coach clients from home or you truly want to simulate a studio-grade environment with uncompromised accuracy.
Don’t forget about the simulation software
Your launch monitor is only half the experience. Software and subscriptions are what shape your daily use.
At The Pop Up Golf, we use the GSPro golf simulator software [↗]. This is because it offers realistic ball physics, over 400 courses, and strong integration with most serious launch monitors.
Before your first purchase, ensure that you confirm the following:
Your launch monitor is compatible with your preferred simulation software.
Total subscription costs, both hardware and software for year one and ongoing thereafter.
PC or laptop requirements for your chosen software.
GSPro runs only on Windows. For most home golf simulators, you should treat the “recommended” column as your starting point rather than chasing the bare minimum.
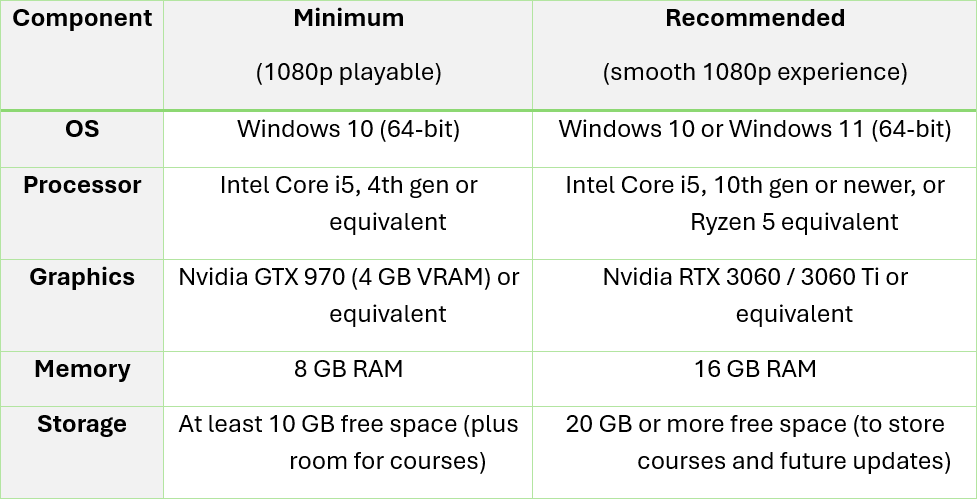
For your reference, we have created a summary table containing the key specs to run GSPro simulation software at minimum and recommended settings.
A cheap work laptop will seriously struggle and cause stuttering or crashes. Therefore, treat your simulator as a system on paper first. Map out all upfront and ongoing costs before you start spending.
Four questions to narrow down your launch monitor choices
What are your room dimensions and lighting?
Ceiling height
Total depth from screen to back wall
Width of the hitting area
Natural light and any artificial light sources
We find that ceiling height and depth are often the hard limit for garages. Ensure these measurements are recorded accurately so that it doesn’t cause you trouble later when purchasing the rest of the equipment.
How will you split your budget?
Plan your spend across three buckets. How much are you prepared to spend for your:
Launch monitor ($800 to $30,000+)
Software (free to $1,500+/yr)
Build hardware: screen, mat, projector, PC and enclosure ($3,000 to $20,000+)
A simple rule of thumb: ensure consistency across your items. If you spend most of your budget on a high-end launch monitor and gaming PC but can only afford a dim projector running at WXGA resolution, the overall experience will be bottlenecked despite your core hardware being strong. This can get really technical so please do not hesitate to submit an enquiry [↗] with your questions and our team will be happy to help, free of charge.
Which data points are non-negotiable?
Make sure that the data you’re seeking aligns with your current capacity and level in golf.
For example, if you’re a 15 handicapper, you will get more value by improving strike, ball speed and predictable carry distances than chasing advanced club data. Here, the priority is striking the middle of the face more often and tightening dispersion.
If you’re a low handicap player working on wedge control or shot shaping, detailed data becomes more useful. Spin rate, spin axis, peak height, descent angle and closure rate of the face can help tailor specific trajectories and distance windows. In that case, it makes sense to invest in a higher-end launch monitor or simulator that measures full ball and club delivery.
At a minimum, look for a system that provides:
Carry distance
Total distance
Ball speed
Club speed
Launch angle
Spin rate (or a reliable estimate)
Basic offline dispersion (start line and distance left or right of target)
If a unit cannot give you these consistently, it will limit the quality of your practice.
Where will you use the setup?
A permanent home golf simulator has different requirements to a mobile or multi-purpose setup. If your garage doubles as a parking space or storage area, you may need a system that packs away quickly after each session. If you have a dedicated room, you can prioritise a more permanent enclosure and screen.
For permanent, enclosed spaces with controlled lighting, camera-based launch monitors are often simpler to use. For flexible or portable setups, radar units become more attractive, provided you have enough depth behind the ball and in front of the screen for the ball flight to be tracked accurately.
A common mistake in home golf simulators
A golfer buys a premium launch monitor and they’re so excited to set it up and start hitting. But they end up parking it in a cramped bay with poor lighting and a thin hitting mat, then wonder why the experience feels off. The simulator is essentially a system. For it to really work, consider balancing these factors:
Launch monitor accuracy
Hitting mat quality and forgiveness
Impact screen size and projector brightness
Lighting which does not interfere with tracking
PC performance that doesn’t bottleneck your setup
The most premium launch monitor is bound to disappoint when it’s paired with a hard mat, dim screen and stuttering software. Our recommendation is that you’ll get better value for money from buying a mid-tier monitor and investing in a quality mat and projector rather than going premium on the monitor and compromising everywhere else.
Field-tested picks for different home specs
Small garage with 2.4m to 2.6m ceiling, permanent bay
Camera-based units such as SkyTrak or Bushnell Launch Pro
Ensure your setup has a quality hitting mat and controllable lighting
Multi-use space, prioritising portability
Radar-based units such as the Garmin Approach R10 or Rapsodo MLM
Consider looking into a foldable hitting mat
Dedicated room used as a primary practice hub
High end camera or ceiling-mounted system such as Uneekor or a Foresight unit
Pair with a large impact screen and a powerful gaming PC.
Read our FAQs on mobile golf simulator setups ↗.
Your next steps
That was a lot of information. Follow this quick checklist if you want a home golf simulator that you will actually be proud to show your mates:
Measure your space and take photos.
Set a total budget that covers monitor, software, and build.
Be honest with yourself and decide which data points you need now (not in five years).
Choose radar-based or camera-based units depending on your room and anticipated usage of the setup.
Read reviews from people with similar spaces.
Ultimately, the best launch monitor for your home golf simulator is the one that fits your space, delivers the data you will use, and keeps you coming back to practice.
Want help planning your setup? Explore The Pop Up Golf packages ↗ or book a complimentary consultation ↗ to discuss your room, goals, and budget.
-
For most home setups, a minimum of about 2.4 metres ceiling height and 4.5 to 5 metres total depth is a practical baseline. Radar units often need more depth than camera units.
-
In most single garages with 2.4 to 2.6 metre ceilings, camera units beside the ball are easier to place and protect. Radar units can work if you have enough depth and careful lighting, but they are more sensitive to space constraints.
-
There isn’t a single best option because it really depends on your unique setup. However, camera units such as SkyTrak or Bushnell Launch Pro often fit smaller garages better than radar. They sit beside the ball, need less depth, and are less affected by ball flight distance indoors.
-
Typical ongoing costs include:
Software subscriptions
An occasional upgrade to PC components
Wear and tear on mats and balls
Plan for at least one annual software cost and future hardware upgrades when you choose your launch monitor and PC.